This tutorial might leave you wanting more. Rather than giving you
There are three ways we can handle exceptions using Spring Boot 2 Rest Exceptions: the default handling, exception handling in the controller, or global exception handling. In this tutorial we explore all three ways of handling exceptions.
Project Setup
Before beginning, create your Spring Boot application. If you are new to Spring Boot then you should refer to one of the tutorials here, or on the web before attempting this tutorial. This tutorial assumes you can create, compile, and run a Spring Boot REST application. It also assumes you know how to call a REST endpoint.
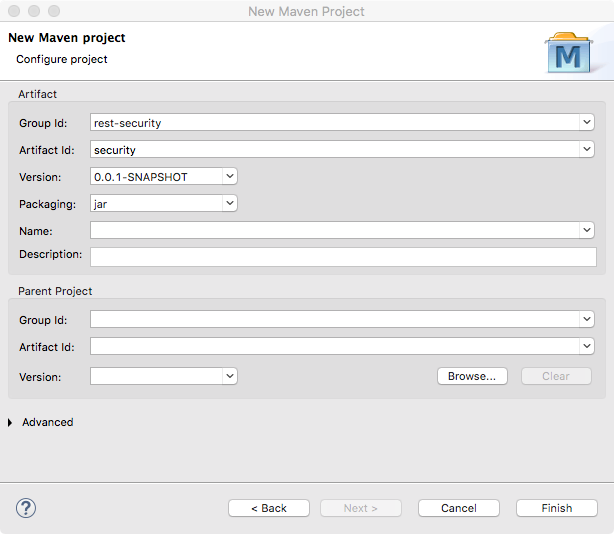
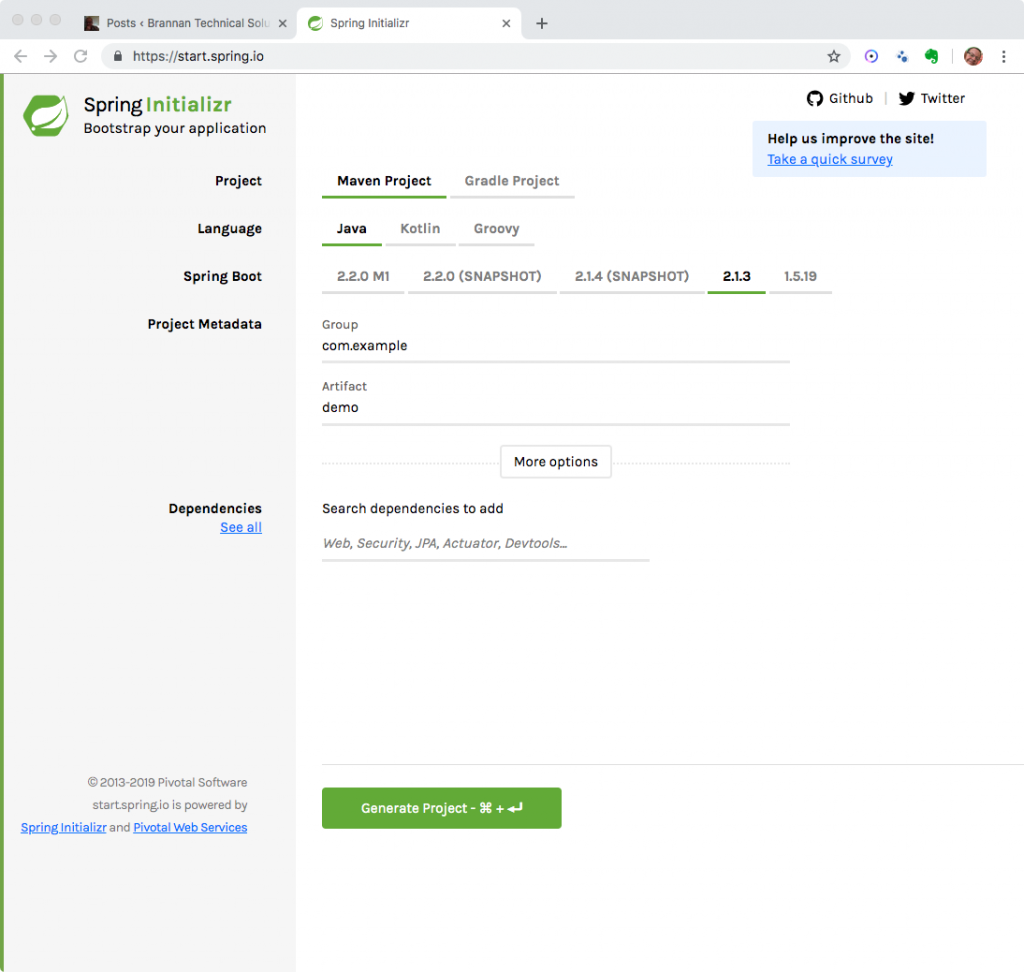
- Create a new Spring Boot Maven project in Eclipse. I used Spring Initializer to create a project. (Spring Initializr Video, Written Tutorial )
- Assign the value com.tutorial.exceptions.spring.rest as the group and the value exceptions-tutorial as the artifact.
- For simplicity, replace the POM with the following.
<?xml version="1.0" encoding="UTF-8"?>
<project xmlns="http://maven.apache.org/POM/4.0.0" xmlns:xsi="http://www.w3.org/2001/XMLSchema-instance" xsi:schemaLocation="http://maven.apache.org/POM/4.0.0 http://maven.apache.org/xsd/maven-4.0.0.xsd">
  <modelVersion>4.0.0</modelVersion>
    <parent>
      <groupId>org.springframework.boot</groupId>
      <artifactId>spring-boot-starter-parent</artifactId>
      <version>2.1.3.RELEASE</version>
      <relativePath /> <!-- lookup parent from repository -->
    </parent>
    <groupId>com.tutorial.exceptions.spring.rest</groupId>
      <artifactId>exceptions-tutorial</artifactId>
      <version>0.0.1-SNAPSHOT</version>
      <name>exceptions-tutorial</name>
      <description>Tutorial project demonstrating exceptions in Spring Rest.</description>
      <properties>
        <java.version>1.8</java.version>
      </properties>
      <dependencies>
        <dependency>
          <groupId>org.springframework.boot</groupId>
          <artifactId>spring-boot-starter-web</artifactId>
	</dependency>
	<dependency>
          <groupId>org.springframework.boot</groupId>
          <artifactId>spring-boot-starter-test</artifactId>
          <scope>test</scope>
        </dependency>
      </dependencies>
      <build>
        <plugins>
          <plugin>
            <groupId>org.springframework.boot</groupId>
            <artifactId>spring-boot-maven-plugin</artifactId>
          </plugin>
        </plugins>
      </build>
</project>- Create a new class named ExceptionTutorialApplication that extends SpringBootApplication and starts the Spring application in the main method.
package com.tutorial.exceptions.spring.rest.exceptionstutorial;

import org.springframework.boot.SpringApplication;
import org.springframework.boot.autoconfigure.SpringBootApplication;

@SpringBootApplication
public class ExceptionsTutorialApplication {

  public static void main(String[] args) {
    SpringApplication.run(ExceptionsTutorialApplication.class, args);
  }
}- Create a new class named
HelloGoodbye . Create three properties, greeting, goodbye, and type.
package com.tutorial.exceptions.spring.rest.exceptionstutorial;

public class HelloGoodbye {
  private String greeting;
  private String goodbye;
  private String type;

  public String getType() {
    return type;
  }
  public void setType(String type) {
    this.type = type;
  }
  public String getGoodbye() {
    return goodbye;
  }
  public void setGoodbye(String goodbye) {
    this.goodbye = goodbye;
  }
  public String getGreeting() {
    return greeting;
  }
  public void setGreeting(String greeting) {
    this.greeting = greeting;
  }
}- Create a new Spring service named GreetingService.
- Suspend disbelief and implement a method named
createGreeting as listed below.
package com.tutorial.exceptions.spring.rest.exceptionstutorial;

import org.springframework.stereotype.Service;

@Service
public class GreetingService {

  public HelloGoodbye createGreeting(String type) {
    HelloGoodbye helloGoodbye = new HelloGoodbye();
    if(type.equals("hello")) {
      helloGoodbye.setGreeting("Hello there.");
    }
    else if(type.equals("goodbye")) {
      helloGoodbye.setGoodbye("Goodbye for now.");
    }
    helloGoodbye.setType(type);
    return helloGoodbye;
  }
}- Create a new Spring rest controller and auto-wire the GreetingService.
- Create a new method, getGreeting, that takes a request parameter named type and calls the GreetingService
createGreeting method.
package com.tutorial.exceptions.spring.rest.exceptionstutorial;

import org.springframework.beans.factory.annotation.Autowired;
import org.springframework.web.bind.annotation.GetMapping;
import org.springframework.web.bind.annotation.RequestMapping;
import org.springframework.web.bind.annotation.RequestParam;
import org.springframework.web.bind.annotation.RestController;


@RestController
@RequestMapping(value = "/greeting")
public class GreetingController {

  @Autowired
  protected GreetingService service;

  @GetMapping("/greet")
  public HelloGoodbye getGreeting(@RequestParam("type") String type) {
    HelloGoodbye goodBye = service.createGreeting(type);
    return goodBye;
  }
}- Compile and run the application.
- Use Curl, a WebBrowser, or some other tool such as Postman to call the rest endpoint and assign type the value hello.
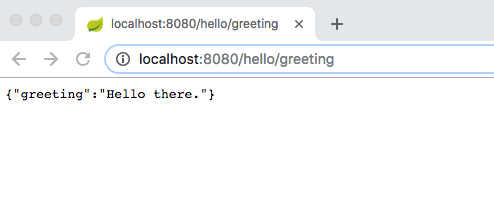
http://localhost:8080/greeting/greet?type=hello- Note the JSON response.
{
    "greeting": "Hello there.",
    "goodbye": null,
    "type": "hello"
}- Change type to goodbye and call the rest endpoint again.
http://localhost:8080/greeting/greet?type=goodbye{
"greeting": null,
"goodbye": "Goodbye for now.",
"type": "goodbye"
}- Change the type to wrong and note the response.
http://localhost:8080/greeting/greet?type=wrong{
"greeting": null,
"goodbye": null,
"type": "wrong"
}The response is not very helpful when an incorrect value for type is passed to the rest endpoint. Moreover, the response will likely result in a client application throwing a NullPointerException, as both greeting and goodbye are null. Instead, we should throw an exception when an incorrect value is passed to the endpoint.
As an aside, yes,
public class HelloGoodbye {
  private String message;
  private String type;

  public String getType() {
    return type;
  }
  public void setType(String type) {
    this.type = type;
  }
  public String getMessage() {
    return message;
  }
  public void setMessage(String msg) {
    this.message = msg;
  }
}
Default Exception Handling
Spring Boot provides exception handling by default. This makes it much easier for both the service endpoint and client to communicate failures without complex coding.
- Modify createGreeting to throw an Exception if type is not the value hello or goodbye.
package com.tutorial.exceptions.spring.rest.exceptionstutorial;

import org.springframework.stereotype.Service;

@Service
public class GreetingService {

  public HelloGoodbye createGreeting(String type) throws Exception {
    HelloGoodbye helloGoodbye = new HelloGoodbye();
    if (type.equals("hello")) {
      helloGoodbye.setGreeting("Hello there.");
    } else if (type.equals("goodbye")) {
      helloGoodbye.setGoodbye("Goodbye for now.");
    } else {
      throw new Exception("Valid types are hello or goodbye.");
    }
    helloGoodbye.setType(type);
    return helloGoodbye;
  }
}- Modify GreetingController getGreeting to throw an Exception.
package com.tutorial.exceptions.spring.rest.exceptionstutorial;

import org.springframework.beans.factory.annotation.Autowired;
import org.springframework.web.bind.annotation.GetMapping;
import org.springframework.web.bind.annotation.RequestMapping;
import org.springframework.web.bind.annotation.RequestParam;
import org.springframework.web.bind.annotation.RestController;


@RestController
@RequestMapping(value = "/greeting")
public class GreetingController {

  @Autowired
  protected GreetingService service;

  @GetMapping("/greet")
  public HelloGoodbye getGreeting(@RequestParam("type") String type) throws Exception {
    HelloGoodbye goodBye = service.createGreeting(type);
    return goodBye;
  }
}- Compile, run the application, and visit the rest endpoint. Note the response returns the error as json.
{
    "timestamp": "2019-04-06T18:07:34.344+0000",
    "status": 500,
    "error": "Internal Server Error",
    "message": "Valid types are hello or goodbye.",
    "path": "/greeting/greet"
}
When changing the
Usually, business logic exceptions warrant a business logic exception rather than a generic exception. Let’s modify the code to throw a custom exception.
- Create a class named GreetingTypeException that extends Exception.
- Assign it an bad request status through the @ResponseStatus annotation.
package com.tutorial.exceptions.spring.rest.exceptionstutorial;

import org.springframework.web.bind.annotation.ResponseStatus;
import org.springframework.http.HttpStatus;

@ResponseStatus(value = HttpStatus.BAD_REQUEST)
public class GreetingTypeException extends Exception {

  private static final long serialVersionUID = -189365452227508599L;

  public GreetingTypeException(String message) {
    super(message);
  }

  public GreetingTypeException(Throwable cause) {
    super(cause);
  }

  public GreetingTypeException(String message, Throwable cause)
  {
    super(message, cause);
  }
}- Modify createGreeting to throw a GreetingTypeException rather than an Exception.
public HelloGoodbye createGreeting(String type) throws GreetingTypeException {

  HelloGoodbye helloGoodbye = new HelloGoodbye();

  if (type.equals("hello")) {
    helloGoodbye.setGreeting("Hello there.");
  } else if (type.equals("goodbye")) {
    helloGoodbye.setGoodbye("Goodbye for now.");
  } else {
  throw new GreetingTypeException("Valid types are hello or goodbye.");
  }

  helloGoodbye.setType(type);
  return helloGoodbye;
}- Compile, run the application, and visit the rest endpoint. Assign an incorrect value to the type parameter.
http://localhost:8080/greeting/greet?type=cc{
"timestamp": "2019-03-29T01:54:40.114+0000",
"status": 400,
"error": "Bad Request",
"message": "Valid types are hello or goodbye.",
"path": "/greeting/greet"
}- Create an exception named NameNotFoundException. Have the exception extend RuntimeException rather than Exception.
- Assign it a response status of not found.
package com.tutorial.exceptions.spring.rest.exceptionstutorial;

import org.springframework.web.bind.annotation.ResponseStatus;
import org.springframework.http.HttpStatus;

@ResponseStatus(value = HttpStatus.NOT_FOUND)
public class NameNotFoundException extends RuntimeException {
  public NameNotFoundException(String message) {
    super("The id: " + message + " could not be found.");
  }
}
- Modify GreetingService createGreeting method to take id as an integer.
- Create a new method called getPersonName. Suspend disbelief and implement it as below. Obviously in a real-world project you would get user information from a database, LDAP server, or some other datastore.
- Modify createGreeting to use the getPersonName method to personalize the greeting.
package com.tutorial.exceptions.spring.rest.exceptionstutorial;

import org.springframework.stereotype.Service;

@Service
public class GreetingService {
  public HelloGoodbye createGreeting(String type, int id) throws GreetingTypeException {
    HelloGoodbye helloGoodbye = new HelloGoodbye();
    if (type.equals("hello")) {
      helloGoodbye.setGreeting("Hello there " +
        this.getPersonName(id));
    } else if (type.equals("goodbye")) {
      helloGoodbye.setGoodbye("Goodbye for now " +
        this.getPersonName(id));
    } else {
      throw new GreetingTypeException("Valid types are hello or goodbye.");
    }
    helloGoodbye.setType(type);
    return helloGoodbye;
  }

  public String getPersonName(int id) {
    if(id==1) {
      return "Tom";
    } else if(id==2) {
      return "Sue";
    } else {
      throw new NameNotFoundException(Integer.toString(id));
    }
  }
}- Modify GreetingController to take id as a request parameter and modify its call to the GreetingService
createGreeting method to also passid to the service.
package com.tutorial.exceptions.spring.rest.exceptionstutorial;

import org.springframework.beans.factory.annotation.Autowired;
import org.springframework.web.bind.annotation.GetMapping;
import org.springframework.web.bind.annotation.RequestMapping;
import org.springframework.web.bind.annotation.RequestParam;
import org.springframework.web.bind.annotation.RestController;

@RestController
@RequestMapping(value = "/greeting")
public class GreetingController {

  @Autowired
  protected GreetingService service;

  @GetMapping("/greet")
  public HelloGoodbye getGreeting(@RequestParam("type") String type, @RequestParam("id") int id) {
    HelloGoodbye goodBye = service.createGreeting(type, id);
      return goodBye;
    }
}- Compile, run the application, and visit the endpoint.
http://localhost:8080/greeting/greet?type=hello&id=2{
"greeting": "Hello there Sue",
"goodbye": null,
"type": "hello"
}- Change the id query parameter’s value to six and note the exception.
http://localhost:8080/greeting/greet?type=hello&id=6{
"timestamp": "2019-03-31T20:30:18.727+0000",
"status": 404,
"error": "Not Found",
"message": "The id: 6 could not be found.",
"path": "/greeting/greet"
}As an aside, notice that we had NameNotFoundException extend RuntimeException and not Exception. By doing this we made NameNotFoundException an unchecked exception (more on unchecked exceptions) and were not required to handle the exception.
Controller Error Handlers
Although Spring Boot’s default exception handling is robust, there are times an application might require more customized error handling. One technique is to declare an exception handling method in a rest controller. This is accomplished using Spring’s @Exceptionhandler annotation (
- Create a new simple class named GreetingError. Note that it is a pojo and does not extend Exception.
package com.tutorial.exceptions.spring.rest.exceptionstutorial;

import java.util.Date;

public class GreetingError {
  private Date timestamp;
  private String message;

  public Date getTimestamp() {
    return timestamp;
  }
  public void setTimestamp(Date timestamp) {
    this.timestamp = timestamp;
  }
  public String getMessage() {
    return message;
  }
  public void setMessage(String message) {
    this.message = message;
  }
}- Modify GreetingController to have a method named nameNotFoundException that is annotated with an @ExceptionHandler annotation.
- Implement nameNotFoundException to return a ResponseEntity<>.
package com.tutorial.exceptions.spring.rest.exceptionstutorial;

import java.util.Date;

import org.springframework.beans.factory.annotation.Autowired;
import org.springframework.http.HttpStatus;
import org.springframework.http.ResponseEntity;
import org.springframework.web.bind.annotation.ExceptionHandler;
import org.springframework.web.bind.annotation.GetMapping;
import org.springframework.web.bind.annotation.RequestMapping;
import org.springframework.web.bind.annotation.RequestParam;
import org.springframework.web.bind.annotation.RestController;
import org.springframework.web.context.request.WebRequest;


@RestController
@RequestMapping(value = "/greeting")
public class GreetingController {

  @Autowired
  protected GreetingService service;

  @GetMapping("/greet")
  public HelloGoodbye getGreeting(@RequestParam("type") String type, @RequestParam("id") int id) throws Exception {
    HelloGoodbye goodBye = service.createGreeting(type, id);
    return goodBye;
  }

  @ExceptionHandler(NameNotFoundException.class)
  public ResponseEntity<?> nameNotFoundException(NameNotFoundException ex, WebRequest request) {
    GreetingError errorDetails = new GreetingError();
    errorDetails.setTimestamp(new Date());
    errorDetails.setMessage("This is an overriding of the standard exception: " + ex.getMessage());
    return new ResponseEntity<>(errorDetails, HttpStatus.NOT_FOUND);
  }
}- Compile, run the application, and visit the endpoint.
http://localhost:8080/greeting/greet?type=hello&id=33
{
    "timestamp": "2019-04-01T02:14:51.744+0000",
    "message": "This is an overriding of the standard exception: The id: 33 could not be found."
}
The default error handling for NameNotFoundException is overridden in the controller. But you are not limited to implementing one error handler in a controller, you can define multiple
- Modify GreetingController to throw an arithmetic exception in getGreeting.
- Create a new exception handler for ArithmeticException.
package com.tutorial.exceptions.spring.rest.exceptionstutorial;

import java.util.Date;

import org.springframework.beans.factory.annotation.Autowired;
import org.springframework.http.HttpStatus;
import org.springframework.http.ResponseEntity;
import org.springframework.web.bind.annotation.ExceptionHandler;
import org.springframework.web.bind.annotation.GetMapping;
import org.springframework.web.bind.annotation.RequestMapping;
import org.springframework.web.bind.annotation.RequestParam;
import org.springframework.web.bind.annotation.RestController;
import org.springframework.web.context.request.WebRequest;


@RestController
@RequestMapping(value = "/greeting")
public class GreetingController {
  @Autowired
  protected GreetingService service;

  @GetMapping("/greet")
  public HelloGoodbye getGreeting(@RequestParam("type") String type, @RequestParam("id") int id) throws Exception {
    int i = 0;
    int k = 22/i;
    HelloGoodbye goodBye = service.createGreeting(type, id);
    return goodBye;
  }

  @ExceptionHandler(NameNotFoundException.class)
  public ResponseEntity<?> nameNotFoundException(NameNotFoundException ex, WebRequest request) {
    GreetingError errorDetails = new GreetingError();
    errorDetails.setTimestamp(new Date());
    errorDetails.setMessage("This is an overriding of the standard exception: " + ex.getMessage());
    return new ResponseEntity<>(errorDetails, HttpStatus.NOT_FOUND);
  }

  @ExceptionHandler(ArithmeticException.class)
  public ResponseEntity<?> arithmeticException(ArithmeticException ex, WebRequest request) {
    GreetingError errorDetails = new GreetingError();
    errorDetails.setTimestamp(new Date());
    errorDetails.setMessage("This is an overriding of the standard exception: " + ex.getMessage());
    return new ResponseEntity<>(errorDetails, HttpStatus.INTERNAL_SERVER_ERROR);
  }

}- Compile, run the application, and visit the rest endpoint.
{
    "timestamp": "2019-04-01T02:40:53.527+0000",
    "message": "This is an overriding of the standard exception: / by zero"
}- Before continuing, do not forget to remove the code that divides by zero.
The Exception handler is a useful annotation that allows handling exceptions within a class. We used it in our controller to handle exceptions. The method used to handle the exception returned a ResponseEntity<T> class (javadoc). This class is a subclass of HttpEntity (
Global Error Handler
The @ControllerAdvice is a way to handle exceptions within Spring Controllers. It allows using a method annotated with the @ExceptionHandler to handle all exceptions in an application.
- Create a new class named GreetingExceptionHandler.
- Annotate it with the @ControllerAdvice annotation.
- Copy and paste the nameNotFoundException method from the GreetingController class. Change the message text to be certain it is, in fact, being called.
package com.tutorial.exceptions.spring.rest.exceptionstutorial;

import java.util.Date;

import org.springframework.http.HttpStatus;
import org.springframework.http.ResponseEntity;
import org.springframework.web.bind.annotation.ControllerAdvice;
import org.springframework.web.bind.annotation.ExceptionHandler;
import org.springframework.web.context.request.WebRequest;

@ControllerAdvice
public class GreetingExceptionHandler {
  @ExceptionHandler(NameNotFoundException.class)
  public ResponseEntity<?> nameNotFoundException(NameNotFoundException ex, WebRequest request) {
    GreetingError errorDetails = new GreetingError();
    errorDetails.setTimestamp(new Date());
    errorDetails.setMessage("This a global exception handler: " + ex.getMessage());
    return new ResponseEntity<>(errorDetails, HttpStatus.NOT_FOUND);
    }
}- Remove the NameNotFoundException exception handler from the GreetingController class.
package com.tutorial.exceptions.spring.rest.exceptionstutorial;

import java.util.Date;

import org.springframework.beans.factory.annotation.Autowired;
import org.springframework.http.HttpStatus;
import org.springframework.http.ResponseEntity;
import org.springframework.web.bind.annotation.ExceptionHandler;
import org.springframework.web.bind.annotation.GetMapping;
import org.springframework.web.bind.annotation.RequestMapping;
import org.springframework.web.bind.annotation.RequestParam;
import org.springframework.web.bind.annotation.RestController;
import org.springframework.web.context.request.WebRequest;


@RestController
@RequestMapping(value = "/greeting")
public class GreetingController {

  @Autowired
  protected GreetingService service;

  @GetMapping("/greet")
  public HelloGoodbye getGreeting(@RequestParam("type") String type, @RequestParam("id") int id) throws Exception {
    HelloGoodbye goodBye = service.createGreeting(type, id);
    return goodBye;
  }

  @ExceptionHandler(ArithmeticException.class)
  public ResponseEntity<?> arithmeticException(ArithmeticException ex, WebRequest request) {
    GreetingError errorDetails = new GreetingError();
    errorDetails.setTimestamp(new Date());
    errorDetails.setMessage("This is an overriding of the standard exception: " + ex.getMessage());
    return new ResponseEntity<>(errorDetails, HttpStatus.INTERNAL_SERVER_ERROR);
  }
}- Compile, run the application, and visit the rest endpoint. You receive the error created in the global handler.
http://localhost:8080/greeting/greet?type=hello&id=33{
“timestamp”: “2019-04-06T21:21:17.258+0000”,
“message”: “This a global exception handler: The id: 33 could not be found.”
}
The @ControllerAdvice annotation (Javadoc) allows an exception handler to be shared across controllers. It is useful if you wish
Conclusion
Spring Boot 2 Rest Exceptions and handling them is both easy and difficult. It is easy because there are concrete ways to implement exception handling. Moreover, even if you provide no exception handling, it is provided for you by default. It is difficult because there are many different ways to implement exception handling. Spring provides so much customization, so many different techniques, it is sometimes easy to become lost in the details.
In this tutorial we explored three different techniques when dealing with Spring Boot 2 REST Exceptions. You should refer to other tutorials before deciding any one technique is what you should use. In the interest of full disclosure, I personally feel the @ControllerAdvice technique is the most robust, as it allows creating a unified exception handling framework.
Refer to the tutorial: Rest Using Spring Boot for a tutorial on using Spring Boot and REST if you want more information on programming REST using Spring Boot.
Github Source
https://github.com/jamesabrannan/spring-rest-exception-tutorial