
The Spring Security framework provides declarative security for Spring applications. In this tutorial we secure a simple Rest API. We begin with a simple example, progress to using a custom UserDetailsService, and finish by adding method level security.
Spring Security is simple when it works, but can be confusing when it does not. There are differences between Spring and Spring Boot. In this tutorial we use Spring Boot 2.5 and the spring-boot-starter-parent, spring-boot-starter-web and the spring-boot-starter-security packages. These come pre-packaged with many of the dependencies for developers and frees us from worrying about dependencies in this tutorial. But a word of warning, you will find many different tutorials and many different ways to accomplish the same thing. Be certain you are using the technology discussed in the tutorial and not a variant. For instance, in this tutorial we use Spring Boot 2.5 with the Spring Boot starter jars.
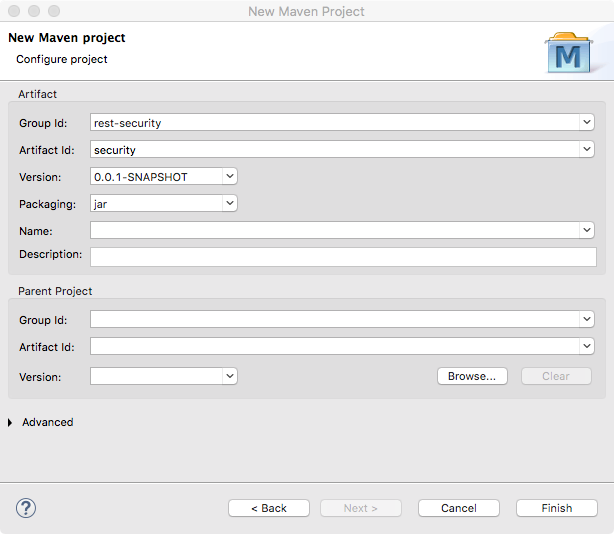
- Create a new Maven application with rest-security as the group id and security as the artifact id.
- Modify the pom.xml so it appears as follows. Note the addition of the spring-boot dependency and the spring boot starter dependencies (including security).
<project xmlns="http://maven.apache.org/POM/4.0.0"
xmlns:xsi="http://www.w3.org/2001/XMLSchema-instance"
xsi:schemaLocation="http://maven.apache.org/POM/4.0.0
http://maven.apache.org/xsd/maven-4.0.0.xsd">
<modelVersion>4.0.0</modelVersion>
<groupId>com.tutorial</groupId>
<artifactId>rest-tutorial</artifactId>
<version>0.0.1-SNAPSHOT</version>
<parent>
<groupId>org.springframework.boot</groupId>
<artifactId>spring-boot-starter-parent</artifactId>
<version>2.0.5.RELEASE</version>
</parent>
<dependencies>
<dependency>
<groupId>org.springframework.boot</groupId>
<artifactId>spring-boot-starter-web</artifactId>
</dependency>
<dependency>
<groupId>org.springframework.boot</groupId>
<artifactId>spring-boot-starter-security</artifactId>
</dependency>
<dependency>
<groupId>org.springframework.boot</groupId>
<artifactId>spring-boot-starter-test</artifactId>
<scope>test</scope>
</dependency>
</dependencies>
<properties>
<java.version>1.8</java.version>
</properties>
<build>
<plugins>
<plugin>
<groupId>org.springframework.boot</groupId>
<artifactId>spring-boot-maven-plugin</artifactId>
</plugin>
</plugins>
</build>
</project>
- Create the packages, com.tutorial.spring.application and com.tutorial.spring.rest.
- In the com.tutorial.spring.rest package create the Hello class as follows.
package com.tutorial.spring.rest;

public class Hello {
  private String greeting;

  public String getGreeting() {
    return greeting;
  }

  public void setGreeting(String greeting) {
    this.greeting = greeting;
  }
}
- Create the controller class, HelloController in the com.tutorial.spring.rest package.
- Add one method named greeting and define it as a Rest endpoint.
package com.tutorial.spring.rest;

import org.springframework.web.bind.annotation.RequestMapping;
import org.springframework.web.bind.annotation.RequestMethod;
import org.springframework.web.bind.annotation.RestController;

@RestController
@RequestMapping(value = "/hello")
public class HelloController {

  @RequestMapping(value = "/greeting", method = RequestMethod.GET)
  public Hello greeting() {
    Hello hello = new Hello();
    hello.setGreeting("Hello there.");
    return hello;
  }
}
- Create the Spring Boot entry-point class in com.tutorial.spring.application package and name it TutorialApplication.
package com.tutorial.spring.application;

import org.springframework.boot.SpringApplication;
import org.springframework.boot.autoconfigure.SpringBootApplication;
import org.springframework.context.annotation.ComponentScan;

@SpringBootApplication
@ComponentScan({ "com.tutorial.spring.rest","com.tutorial.spring.application" })
public class TutorialApplication {
  public static void main(String[] args) {
    SpringApplication.run(TutorialApplication.class, args);
  }
}
If not familiar with the @SpringBootApplication or @ComponentScan annotations, refer to this tutorial, Spring Rest Using Spring Boot. This class is the runner for the application. For more on runners, refer to Spring Boot Runners.
- Create a class named TutorialSecurityConfiguration that extends WebSecurityConfigurerAdapter (Java Doc). Note that there is no @EnableWebSecurity (Java Doc) annotation on TutorialSecurityConfiguration. This annotation is not needed for Spring Boot applications, as it is automatically assumed. But if you are extrapolating this tutorial to a more traditional Spring application, caveat emptor.
- Add the configure, userDetailsService, and the passwordEncoder methods.
package com.tutorial.spring.application;

import org.springframework.context.annotation.Bean;
import org.springframework.context.annotation.Configuration;
import org.springframework.security.config.annotation.web.builders.HttpSecurity;
import org.springframework.security.config.annotation.web.configuration.WebSecurityConfigurerAdapter;
import org.springframework.security.core.userdetails.User;
import org.springframework.security.core.userdetails.UserDetailsService;
import org.springframework.security.crypto.bcrypt.BCryptPasswordEncoder;
import org.springframework.security.crypto.password.PasswordEncoder;
import org.springframework.security.provisioning.InMemoryUserDetailsManager;

@Configuration
public class TutorialSecurityConfiguration extends WebSecurityConfigurerAdapter {

  @Override
  protected void configure(HttpSecurity http) throws Exception {
    http.authorizeRequests().antMatchers("/**").authenticated()
      .and().httpBasic().and().csrf().disable();
  }

  @Bean
  public UserDetailsService userDetailsService() {
    InMemoryUserDetailsManager manager = new InMemoryUserDetailsManager();
    String encodedPassword = passwordEncoder().encode("password");
    manager.createUser(User.withUsername("james").password(encodedPassword)
      .roles("USER").build());
    return manager;
  }

  @Bean
  public PasswordEncoder passwordEncoder() {
    return new BCryptPasswordEncoder();
  }
}
- Start the application.
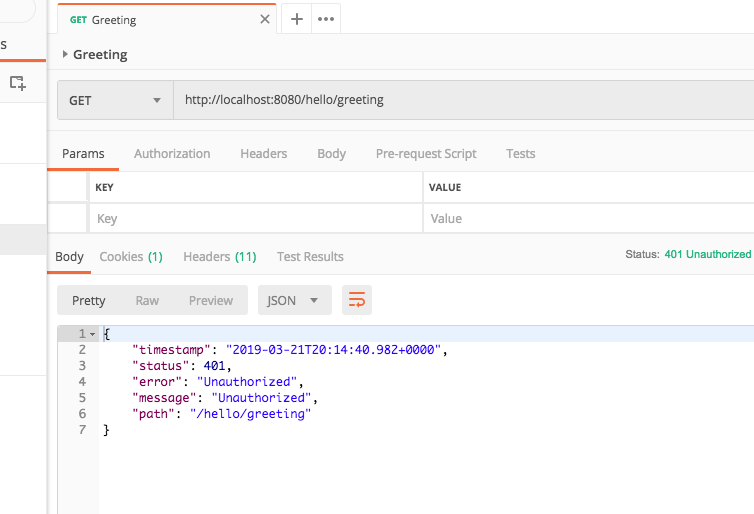
- Open Postman and create a request that makes a GET request. Attempt to call the endpoint and you get an Unauthorized message. Notice the status is a 401 status code which means unauthorized.
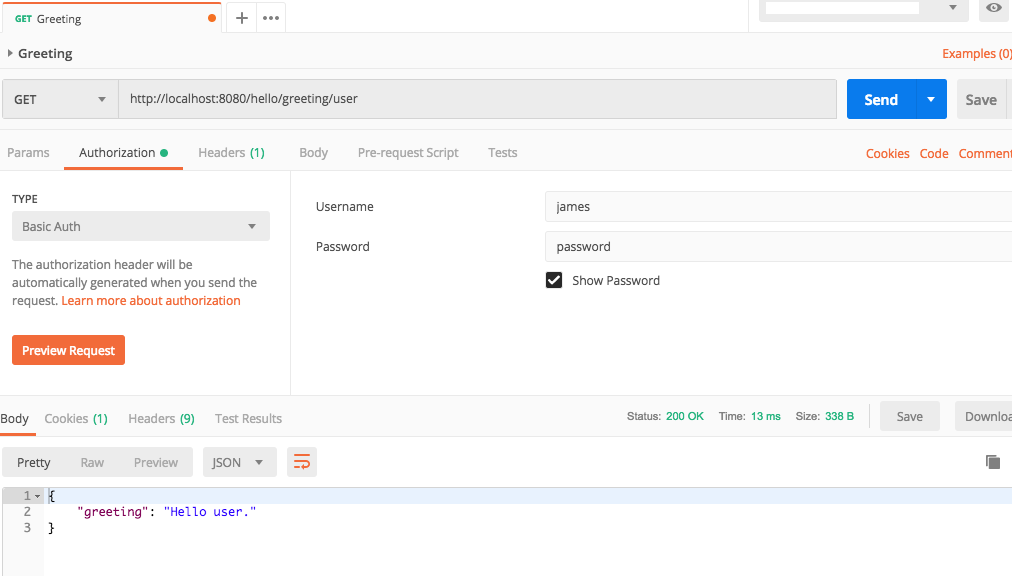
- Modify the Postman request by clicking the Authorization tab, selecting Basic Auth as the authorization type, and then adding the desired Username and Password.
- Call the endpoint and you should receive a valid response.
The TutorialSecurityConfiguration class extends Spring’s WebSecurityConfigurerAdapter class. This class is a base class that allows you to customize your security by overriding the configure(WebSecurity), configure(HttpSecurity), and configure(AuthenticationManagerBuilder) methods in your own custom class.
Http Configure
In TutorialSecurityConfiguration you override the configuration for how Http requests are secured. First, using authorizeRequests, we tell HttpSecurity (Java Doc) to allow restricting requests. We then restrict the requests to those matching the ant pattern. In TutorialSecurityConfiguration we are telling it to restrict it to all requests starting from the root path. We could have omitted antMatchers altogether if we wished. Next we tell HttpSecurity to use basic http authentication and finally to disable protection from cross-site requests (more on CSRF).
http.authorizeRequests().antMatchers("/**").authenticated()
.and().httpBasic().and().csrf().disable();
UserDetailsService
The UserDetailsService interface loads user-specific data (Java Doc). The InMemoryUserDetailsManager is a memory persistent class useful for testing and demonstration (Java Doc). It creates a map that constitute an application’s users. By adding it as a bean Spring security uses it to obtain the user to authenticate. When a user tries to log into the system, it searches for him or her using the user details service. That service can get users from a database, an LDAP server, a flat file, or in memory. See the api for more (implementations of UserDetailsService).
Modify One Endpoint
A Rest API where all endpoints have the same security restrictions is unrealistic. It is more probable that different endpoints are intended for different users. For instance, there might be a /greeting endpoint for the general public, a /greeting/user endpoint for users, and a /greeting/admin endpoint for administrators. Spring security allows adding different security restrictions on each endpoint.
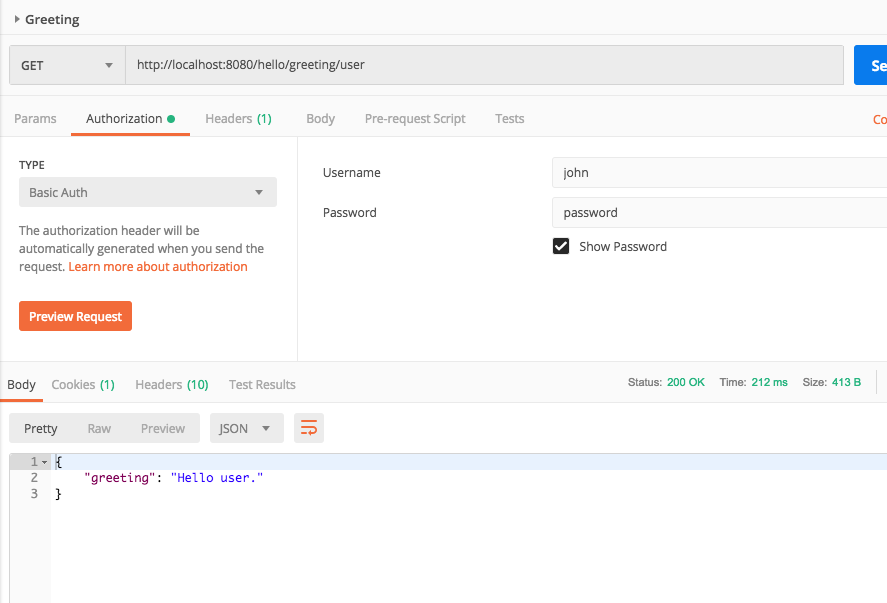
- Modify HelloController to have two new Rest endpoints: /greeting/user and /greeting/admin implemented by the greetingUser and greetingAdmin methods respectively.
package com.tutorial.spring.rest;

import org.springframework.web.bind.annotation.RequestMapping;
import org.springframework.web.bind.annotation.RequestMethod;
import org.springframework.web.bind.annotation.RestController;

@RestController
@RequestMapping(value = "/hello")
public class HelloController {

  @RequestMapping(value = "/greeting", method = RequestMethod.GET)
  public Hello greeting() {
    Hello hello = new Hello();
    hello.setGreeting("Hello there.");
    return hello;
  }

  @RequestMapping(value = "/greeting/user", method = RequestMethod.GET)
  public Hello greetingUser() {
    Hello hello = new Hello();
    hello.setGreeting("Hello user.");
    return hello;
  }

  @RequestMapping(value = "/greeting/admin", method = RequestMethod.GET)
    public Hello greetingAdmin() {
      Hello hello = new Hello();
      hello.setGreeting("Hello administrator.");
      return hello;
  }
}
- Modify TutorialSecurityConfig to secure the two newly added endpoints.
- Add the newly created user to the userDetailsService method.
@Override
protected void configure(HttpSecurity http) throws Exception {
  http
  .authorizeRequests().antMatchers("/hello/greeting").permitAll()
  .antMatchers("/hello/greeting/admin").hasRole("ADMIN")
  .antMatchers("/hello/greeting/user").hasAnyRole("ADMIN","USER").and()
  .httpBasic().and().csrf().disable();
}

@Bean
public UserDetailsService userDetailsService() {
  InMemoryUserDetailsManager manager = new InMemoryUserDetailsManager();
  String encodedPassword = passwordEncoder().encode("password");
  manager.createUser(User.withUsername("james").password(encodedPassword)
    .roles("USER").build());
  manager.createUser(User.withUsername("john").password(encodedPassword)
    .roles("ADMIN").build());
  return manager;
}
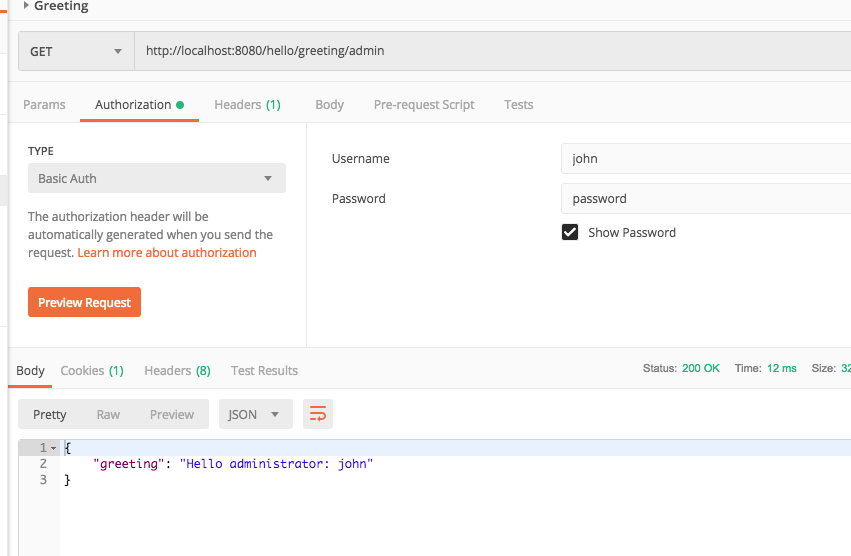
- Run the application. Attempt to access the admin rest endpoint with the john/password credentials and you receive the greeting.
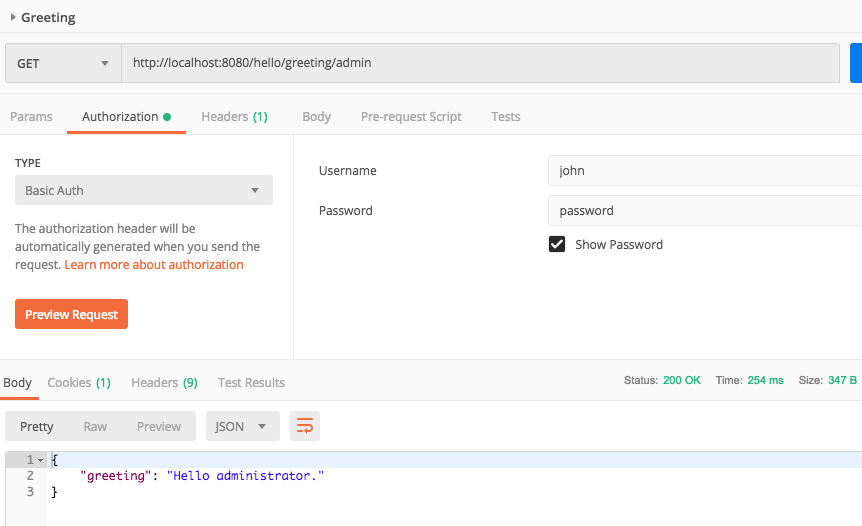
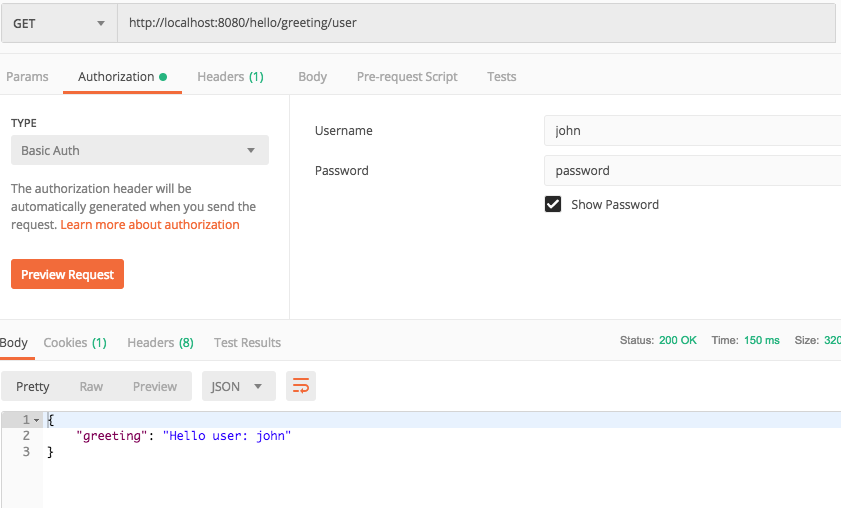
- Now access the user endpoint with john/password as the credentials and you receive the appropriate user greeting.
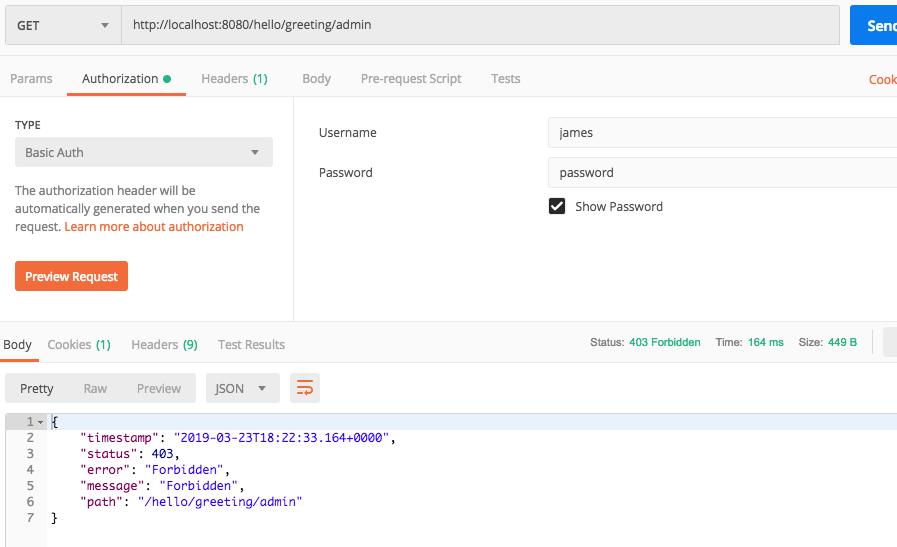
- Change the credentials to james/password and attempt to access the admin endpoint and you get a 403, Forbidden, status code.
Accessing User Information
After a user logs in there are many times you might wish to access details about that user. Spring Security offers an easy way to accomplish this through the UserDetails interface.
The easiest way to obtain a user’s details is through the SecurityContextHolder class. This class holds the security context, which includes the user’s details, or, to use security appropriate terminology: the principal. A principal is any entity that can be authenticated. For instance, another program could be a principal. A “user” need not be a physical person. Provided you realize user does not equal human, you can use the terms interchangeably.
UserDetails userDetails = (UserDetails) SecurityContextHolder.getContext()
  .getAuthentication().getPrincipal();
Through the SecurityContextHolder you get the context, then obtain the authenticated principal, which in turn allows you to obtain the UserDetails. The org.springframework.security.core.userdetails.UserDetails interface is implemented by a org.springframework.security.core.userdetails.User object, so you can cast the results to the UserDetails interface or the User implementation. Of course, you can create your own UserDetails implementation if you prefer, but that is outside this post’s scope.
User user = (User)SecurityContextHolder.getContext().getAuthentication()
  .getPrincipal();
- Modify HelloController‘s endpoints so that they append the username to the greetings. In the greetingUser method cast the results to a UserDetails interface. In the greetingAdmin method cast the results to the User class. (UserDetails and User JavaDocs).
package com.tutorial.spring.rest;

import org.springframework.security.core.context.SecurityContextHolder;
import org.springframework.security.core.userdetails.User;
import org.springframework.security.core.userdetails.UserDetails;
import org.springframework.web.bind.annotation.RequestMapping;
import org.springframework.web.bind.annotation.RequestMethod;
import org.springframework.web.bind.annotation.RestController;

@RestController
@RequestMapping(value = "/hello")
public class HelloController {

  @RequestMapping(value = "/greeting", method = RequestMethod.GET)
  public Hello greeting() {
    Hello hello = new Hello();
    hello.setGreeting("Hello there.");
    return hello;
  }

  @RequestMapping(value = "/greeting/user", method = RequestMethod.GET)
  public Hello greetingUser() {
    UserDetails userDetails = (UserDetails) SecurityContextHolder.getContext()
      .getAuthentication().getPrincipal();
    Hello hello = new Hello();
    hello.setGreeting("Hello user: " + userDetails.getUsername());
    return hello;
  }

  @RequestMapping(value = "/greeting/admin", method = RequestMethod.GET)
  public Hello greetingAdmin() {
    User user = (User)SecurityContextHolder.getContext().getAuthentication()
      .getPrincipal();
    Hello hello = new Hello();
    hello.setGreeting("Hello administrator: " + user.getUsername());
    return hello;
  }
}
- Run the application and when you access the endpoint you should see the username in the JSON greeting.
Create a Custom UserDetailService
Creating a fully customized UserDetailService is outside the scope of this tutorial. Several of the Spring supplied implementations of this interface include JdbcDaoImpl (Java Doc) and LdapUserDetailsService (Java Doc), which provide ways to obtain user details via a Jdbc database source or an LDAP server, respectively. Here, however, we simply create a simple example for the sake of demonstration.
- Create a new class named UserDetailsServiceImpl implements the Spring UserDetailsService interface.
- Implement the loadByUserByUsername method so that it creates the user that accessed the endpoint.
package com.tutorial.spring.application;

import org.springframework.security.core.userdetails.User;
import org.springframework.security.core.userdetails.UserDetails;
import org.springframework.security.core.userdetails.UserDetailsService;
import org.springframework.security.core.userdetails.UsernameNotFoundException;
import org.springframework.security.crypto.bcrypt.BCryptPasswordEncoder;
import org.springframework.stereotype.Service;

@Service
public class UserDetailsServiceImpl implements UserDetailsService {

  public UserDetails loadUserByUsername(String username) throws
    UsernameNotFoundException {
      BCryptPasswordEncoder encoder = new BCryptPasswordEncoder();
      if(username.equals("james")) {
        return User.withUsername("james").password(encoder.encode("password"))
          .roles("USER").build();
      } else if(username.equals("john")) {
        return User.withUsername("john").password(encoder.encode("password"))
          .roles("ADMIN").build();
      }
      else throw new UsernameNotFoundException("user not found");
  }
}
- Modify TutorialSecurityConfiguration to override the configure method that takes an AuthenticationMangerBuilder. Set the builder’s userDetailsService to a newly created instance of the UserDetailsServiceImpl class.
package com.tutorial.spring.application;

import org.springframework.context.annotation.Bean;
import org.springframework.context.annotation.Configuration;
import org.springframework.security.config.annotation.authentication.builders.AuthenticationManagerBuilder;
import org.springframework.security.config.annotation.web.builders.HttpSecurity;
import org.springframework.security.config.annotation.web.configuration.WebSecurityConfigurerAdapter;
import org.springframework.security.crypto.bcrypt.BCryptPasswordEncoder;
import org.springframework.security.crypto.password.PasswordEncoder;

@Configuration
public class TutorialSecurityConfiguration extends WebSecurityConfigurerAdapter {

  @Override
  protected void configure(HttpSecurity http) throws Exception {
    http.authorizeRequests().antMatchers("/hello/greeting").permitAll()
      .antMatchers("/hello/greeting/admin").hasRole("ADMIN")
      .antMatchers("/hello/greeting/user").hasAnyRole("ADMIN","USER").and()
      .httpBasic().and().csrf().disable();
}

  @Bean
  public PasswordEncoder passwordEncoder() {
    return new BCryptPasswordEncoder();
  }


  @Override
  public void configure(AuthenticationManagerBuilder builder) throws Exception {
    builder.userDetailsService(new UserDetailsServiceImpl());
  }
}
- Build and run the application and use Postman to access the endpoints.
Method Security
Modifying the security configuration’s configure method with every additional endpoint is error prone. Moreover, you cannot add security configuration to specific methods, but only paths. Another way to add security is through global method security.
- Modify TutorialSecurityConfiguration by adding the @EnableGlobalSecurity annotation.
@Configuration
@EnableGlobalMethodSecurity(prePostEnabled = true)
public class TutorialSecurityConfiguration extends WebSecurityConfigurerAdapter {
- Create a new endpoint with a method named greetingContractor in the HelloController for contractors.
- Add the @PreAuthorize annotation.
@RequestMapping(value = "/greeting/contractor", method = RequestMethod.GET)
@PreAuthorize("hasRole('CONTRACTOR')")
public Hello greetingContractor() {
  User user = (User)SecurityContextHolder.getContext().getAuthentication()
    .getPrincipal();
  Hello hello = new Hello();
  hello.setGreeting("Hello contractor: " + user.getUsername());
  return hello;
}
- Modify the loadUserByUsername method in UserDetailsServiceImpl to include a contractor.
public UserDetails loadUserByUsername(String username) throws
  UsernameNotFoundException {
  BCryptPasswordEncoder encoder = new BCryptPasswordEncoder();
  if(username.equals("james")) {
    return User.withUsername("james").password(encoder.encode("password"))
      .roles("USER").build();
  } else if(username.equals("john")) {
    return User.withUsername("john").password(encoder.encode("password"))
      .roles("ADMIN").build();
  } else if(username.equals("lisa")) {
      return User.withUsername("lisa").password(encoder.encode("password"))
        .roles("CONTRACTOR").build();
  } else throw new UsernameNotFoundException("user not found");
}
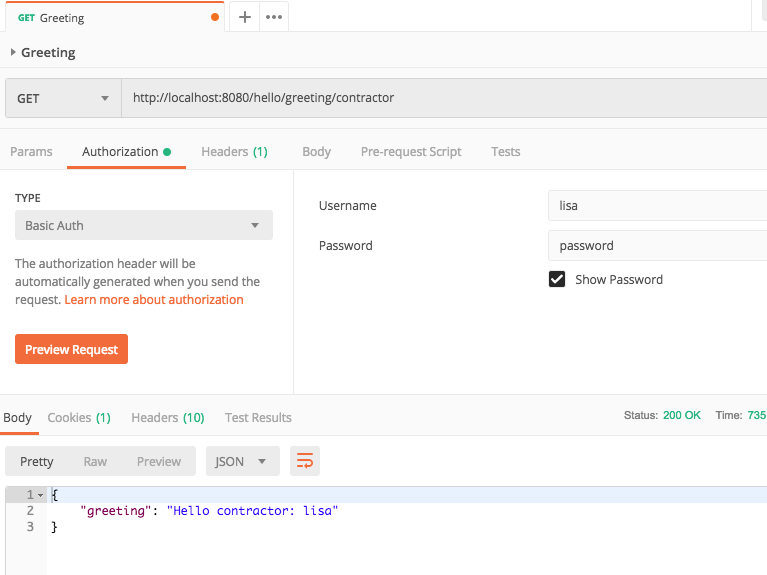
- Run the application and access the contractor endpoint with the lisa/password credentials.
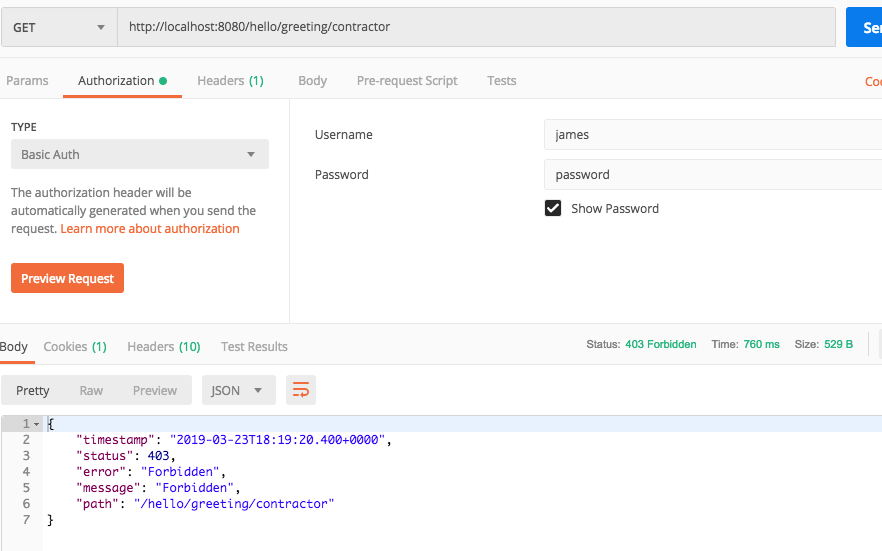
- Try accessing the contractor endpoint with the james/password credentials and you receive a 403, Forbidden, response code.
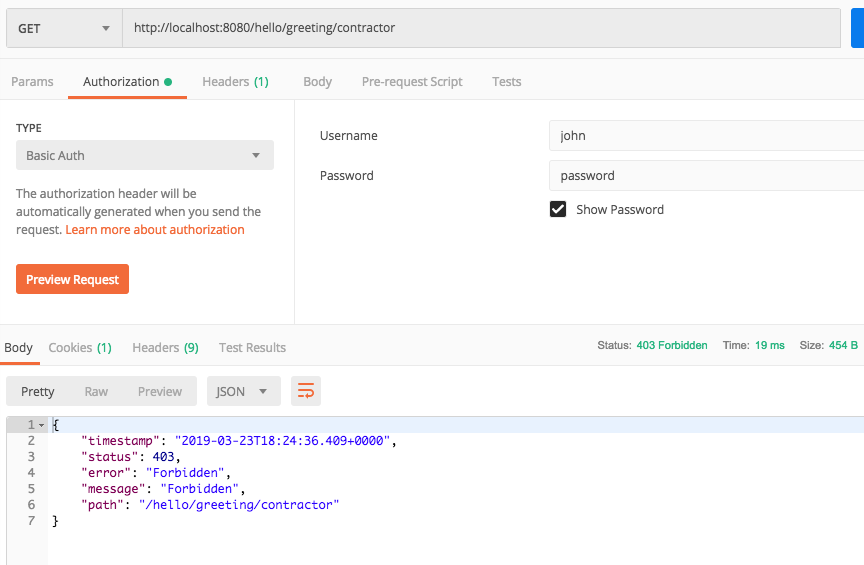
- Try accessing the contractor endpoint with the john/password credentials and you also get a 403 status code.
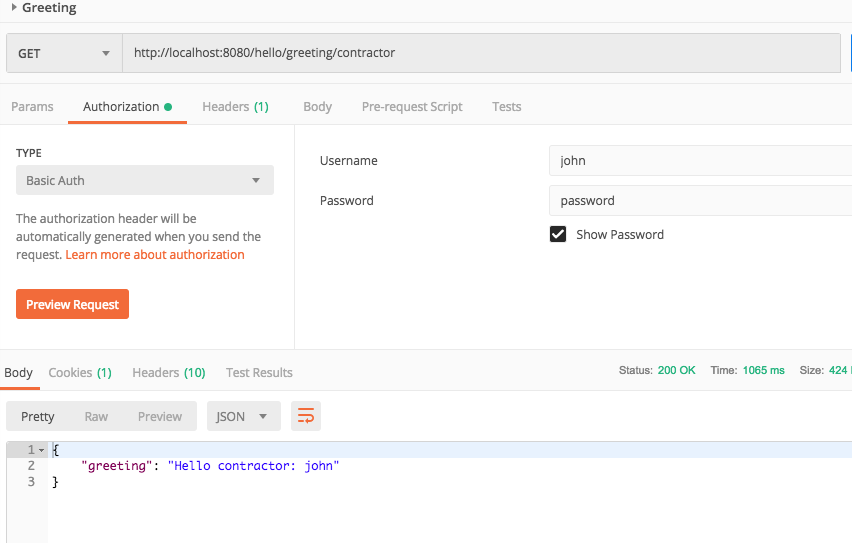
- Modify the greetingContractor method in HelloController so that it uses, hasAnyRole and includes the ADMIN role.
@RequestMapping(value = "/greeting/contractor", method = RequestMethod.GET)
@PreAuthorize("hasAnyRole('CONTRACTOR','ADMIN')")
public Hello greetingContractor() {
- Run the application and access the contractor endpoint with the john/password credentials and you receive the contractor greeting.
Conclusions
In this tutorial you created a simple Rest API secured by an in-memory map of users. It was purposely kept simple to illustrate basic Spring Security as it applies to Spring Boot 2.5 and Rest endpoints. Be advised there are many ways to do things in Spring Security. This tutorial showed one way to secure your API. For more information on Spring’s Security architecture, refer to Spring Security Architecture.
GitHub Repo
You can get the source code from here (Spring Boot 2 Rest Security Tutorial).

