
In a previous post, we created a simple Rest application using GET and Spring Boot. In this tutorial, we create a simple Rest application using POST. If you do not know the difference between GET and POST then you should review this material. In fact, you might wish to go through the W3Schools material prior to completing this simple tutorial. The W3School website is a venerable, yet very relevant, site that is a wealth of development material. Also, if you did not work through the previous tutorial using GET, then at least peruse that tutorial first. In this tutorial we use Spring Boot REST through Http Post.
- Create a new Maven project in Eclipse entitled rest-post.
- After creating the project replace the pom file with the following.
<project xmlns="http://maven.apache.org/POM/4.0.0"
   xmlns:xsi="http://www.w3.org/2001/XMLSchema-instance"
   xsi:schemaLocation="http://maven.apache.org/POM/4.0.0
   http://maven.apache.org/xsd/maven-4.0.0.xsd">
<modelVersion>4.0.0</modelVersion>
<groupId>rest-post-tutorial</groupId>
<artifactId>rest-post</artifactId>
<version>0.0.1-SNAPSHOT</version>
<parent>
<groupId>org.springframework.boot</groupId>
<artifactId>spring-boot-starter-parent</artifactId>
<version>2.0.5.RELEASE</version>
</parent>

<dependencies>
<dependency>
<groupId>org.springframework.boot</groupId>
<artifactId>spring-boot-starter-web</artifactId>
</dependency>
<dependency>
<groupId>org.springframework.boot</groupId>
<artifactId>spring-boot-starter-test</artifactId>
<scope>test</scope>
</dependency>
<dependency>
<groupId>com.jayway.jsonpath</groupId>
<artifactId>json-path</artifactId>
<scope>test</scope>
</dependency>
</dependencies>
<properties>
<java.version>1.8</java.version>
</properties>
<build>
<plugins>
<plugin>
<groupId>org.springframework.boot</groupId>
<artifactId>spring-boot-maven-plugin</artifactId>
</plugin>
</plugins>
</build>
</project>
- Create the com.tutorial.spring.application and com.tutorial.spring.rest and com.tutorial.spring.rest.factory packages.
- Create a new class named Facility and implement it as follows.
package com.tutorial.spring.rest.factory;

import com.fasterxml.jackson.core.JsonProcessingException;
import com.fasterxml.jackson.databind.ObjectMapper;

public class Facility {

  public enum Region {
    NORTH, SOUTH, WEST, EAST
  }

  private Long id;
  private String name;
  private Long workerCount;
  private Double capacity;
  private Region region;

  public Region getRegion() {
    return region;
  }
  public void setRegion(Region region) {
    this.region = region;
  }
  public Long getId() {
    return id;
  }
  public void setId(Long id) {
    this.id = id;
  }
  public String getName() {
    return name;
  }
  public void setName(String name) {
    this.name = name;
  }
  public Long getWorkerCount() {
    return workerCount;
  }
  public void setWorkerCount(Long workerCount) {
    this.workerCount = workerCount;
  }
  public Double getCapacity() {
    return capacity;
  }
  public void setCapacity(Double capacity) {
    this.capacity = capacity;
  }

  @Override
  public String toString() {
    try {
      ObjectMapper mapper = new ObjectMapper();
      String value = mapper.writerWithDefaultPrettyPrinter().
          writeValueAsString(this);
      return value;
    } catch (JsonProcessingException e) {
      e.printStackTrace();
    }
    return null;
  }
}
Notice the toString method and using the ObjectMapper class. ObjectMapper is from the Jackson library. Jackson is a library for parsing JSON and is included with Spring Boot (Jackson on Github).
The ObjectMapper converts the class to JSON and writes it as a String.
- Create a class named FactoryService and mark it as a Spring service by marking it with the @Service annotation.
- Create a createSampleFacility method and a saveFacility method. In a real project these methods would perform much more; however, suspend disbelief and implement them simplistically as in the following code.
package com.tutorial.spring.rest;

import org.springframework.stereotype.Service;
import com.tutorial.spring.rest.factory.Facility;
import com.tutorial.spring.rest.factory.Facility.Region;

@Service
public class FactoryService {

  public Facility createSampleFacility() {
    Facility sample = new Facility();
    sample.setCapacity(2222.22);
    sample.setId((long) 100);
    sample.setName("Sample Facility");
    sample.setRegion(Region.NORTH);
    sample.setWorkerCount((long)10000);
    return sample;
  }

  public void saveFacility(Facility facility) {
    System.out.println("saving a " + facility.toString());
  }
}
- Create the rest controller named FactoryController.
- Create two methods, getFacility and createFacility, and annotate them as in the following code.
package com.tutorial.spring.rest;

import org.springframework.beans.factory.annotation.Autowired;
import org.springframework.web.bind.annotation.GetMapping;
import org.springframework.web.bind.annotation.PostMapping;
import org.springframework.web.bind.annotation.RequestBody;
import org.springframework.web.bind.annotation.RequestMapping;
import org.springframework.web.bind.annotation.RestController;
import com.tutorial.spring.rest.factory.Facility;

@RestController
@RequestMapping(value = "/factory")
public class FactoryController {

  @Autowired
  protected FactoryService service;

  @GetMapping("/facility/sample")
  public Facility getFacility() {
    return service.createSampleFacility();
  }

  @PostMapping("/facility")
  public void createFacility(@RequestBody Facility facility) {
    service.saveFacility(facility);
  }
}
Note the @GetMapping and the @PostMapping annotations. In the last tutorial we used the @RequestMapping annotation and then specified that it was either GET or POST, as in the following.
@RequestMapping(value = "/Widget", method = RequestMethod.GET)
The @GetMapping and the @PostMapping annotations are shortcuts for the @RequestMapping annotation. Both methods call the associated service method in the FactoryService marked by the @Autowired annotation.
- Create a new Request in PostMan that requests a sample Facility.
- Run the method and copy the response.
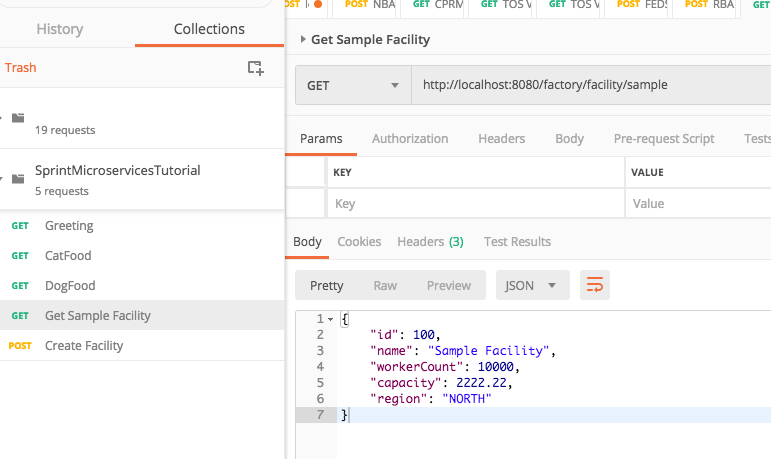
- Modify the response as follows.
{
"id": 200,
"name": "Heather Ridge",
"workerCount": 54000,
"capacity": 99987.34,
"region": "WEST"
}
- Create a new Request, ensure the method is Post, and in the Body tab, click raw, and then enter the JSON from step nine.
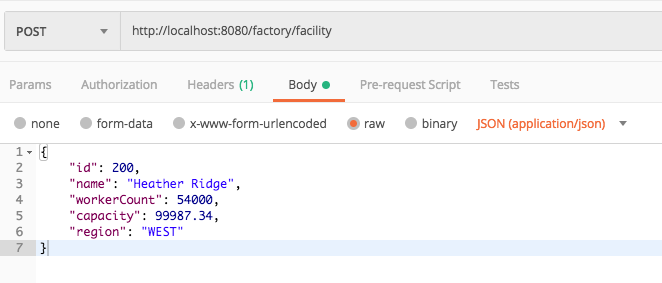
- Ensure the type is JSON (application/json) as in the following image.
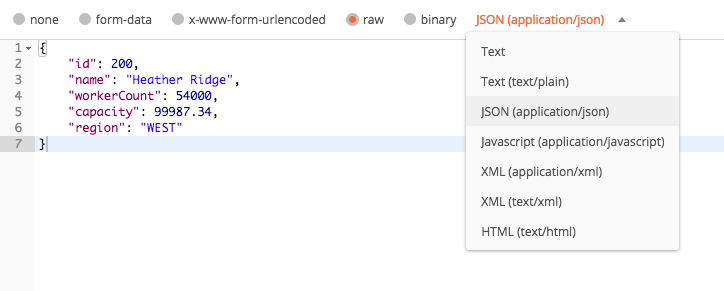
- Ensure the method is POST, the Body has the Json string, and the method is set to JSON.
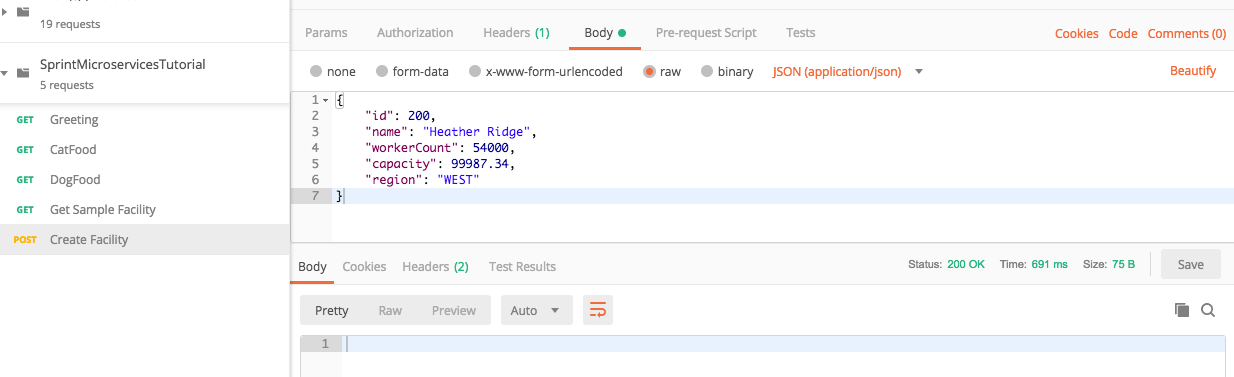
- Click Submit and the Json is sent to the Rest endpoint. The following is printed to the server console.
saving as a {
"id" : 200,
"name" : "Heather Ridge",
"workerCount" : 54000,
"capacity" : 99987.34,
"region" : "WEST"
}
The only thing returned to Postman is the 200 Http response code that indicated the request succeeded (response codes).
Simple tutorial illustrating converting a Java object to and from JSON.

